Pages

Showing posts with label cheap. Show all posts

Tuesday, April 5, 2011

Broccoli Rice Bake (a.k.a. Leftovers Casserole)


Now it seems like a no-brainer to cover some leftovers in creamy sauce, bake them up with some cheese, and then - voila - a whole new dinner, but I'd never tried it until I saw a recipe similar to this in a Cook's Illustrated special issue about quick meals. I love that magazine for ideas and tips, but even the quick recipes are so fussy I often don't follow the exact instructions. It's not that I doubt their version is more efficient and maybe even better, they're just so bossy. But the interchangeability of this meal is undeniable. You could make it with rice, pasta, or even potatoes for the "base," then add just about any protein (or not), and a wide variety of vegetables. All you'd make is the sauce. I do make it sometimes with no leftovers at all, but it's better to wait until I have some rice and chicken in the fridge so it's less work (the only thing I wouldn't use - veggies that are already on the soft side). And it freezes well. Oh, I forgot to mention it's delicious.

Broccoli Rice Bake (a.k.a Leftovers Casserole)
serves 4 generously

4 cups cooked/1.5 cups uncooked brown rice
2 chicken breasts (about 1.5 pounds)
4 cups broccoli
4 T butter
1 onion, diced
2 cloves garlic, minced
1/4 cup flour
1 cup stock
1 cup cream
1 t mustard
1.5 cups cheese (I like a mix of Parm and Cheddar)

  • If you're not using leftovers, cook the rice; steam the broccoli until it's still a little crunchy (so it doesn't turn to mush when baked); then cut the chicken breasts into bite-sized pieces and saute in a couple tablespoons of butter or oil until light brown and cooked through. Set these aside.
  • In a large, high-sided frying pan that can go in the oven,* melt the butter and add the onion. Saute until the edges start to brown and then add the garlic. 
  • Saute until the garlic softens (a couple of minutes) and then sprinkle the flour over the onions and garlic. Stir well so the flour has a chance to brown for a minute or two, but not burn (it will stick to the pan, but don't worry).
  • Dump in the cream, stock, and mustard and whisk vigorously.
  • Add the broccoli, chicken, and 2/3 of the cheese and stir well. 
  • Add the salt and pepper to taste. 
  • If you're using leftovers, stir this on the heat for a few minutes so that the ingredients are heated through.
  • Sprinkle the remaining cheese over the top and pop under the broiler until brown and bubbly. 
  • Allow to cool for 5 to 10 minutes before serving.
*If you don't have a big enough pan, you can combine everything in a bowl and then transfer it all to a broiler-safe dish in the end.

Wednesday, January 26, 2011

Roasted Garlic Tomato Soup with Cheesies

I blame learning to crochet for my recent lack of blog posts. It's not that I haven't been making dinner, it's that I'm spending all my free mornings making hats instead of writing up blog posts. Add to this John's new, let's call it challenging, work schedule and it also hasn't been a month for much experimenting in the kitchen. Enter Tomato Soup with Cheesies. I hadn't made this soup in years, but I remembered it as the great Emergency Soup from when I was cooking. We always had roasted garlic in the fridge, cans of good tomatoes on the shelf, cream in the pastry department, and that's about all it takes. It's a rich enough soup that I like to eat it with Cheesies (that's what we called toast with melted cheese on top when we were kids) instead of the usual grilled cheese sandwich. I don't keep roasted garlic around now (though maybe I should), so that was the one element I had to plan ahead for. You could probably skip it if you're in a hurry.

Roasted Garlic Tomato Soup with Cheesies
served 2 for dinner with 4 servings left to put in the freezer for lunches

1 head of garlic
olive oil
1 onion, chopped
1 T tomato paste
2 cans of whole tomatoes
1 t dried thyme
pinch of red pepper flakes
4 cups stock*
1 cup cream
2 T balsamic vinegar
1/2 cup chopped fresh basil (or sub1 T dried and add it with the thyme)
a few slices of your favorite sliced bread and cheese

  • To roast the garlic, start by cutting off the top of the head so that some of the tips of the cloves are exposed. Set the head on a square of tin foil, drizzle with olive oil, and close it up in a little packet. Roast in a 350 oven for about an hour. The cloves will be soft and brown. This keeps in the fridge for about a week.
  • In your soup pot, saute the onion in a little olive oil until it is nicely browned - about 8 minutes or so.
  • Add the tomato paste and stir and cook until it's just starting to stick to the bottom of the pot.
  • Add the tomatoes with all their liquid, stock, thyme (and basil if using dried), red pepper flakes, and salt and pepper to taste. 
  • Squish the roasted garlic cloves out of their skins and add.
  • Simmer 30 minutes to an hour depending on how thick you like your soup. Remember that you're going to add cream next, so let it be a little on the thick side.
  • Remove from the heat and add the cream, basil, and balsamic. 
  • Blend with a hand blender or in batches in a food processor or blender.
  • Serve with Cheesies: toast one side of the bread under the broiler until it's just about to start turning brown. Flip the bread over, top with cheese, and broil until the cheese is melted.

*I use a stock base (Better than Bouillon) instead of liquid stock so that I don't have to simmer the soup as long to get it to the right consistency. So for this recipe I'd add 2 cups of water and 4 t of stock base instead of 4 cups of stock. If you don't have, or don't like, the paste stock consider putting your liquid stock in a pot and reducing it by half while the garlic is roasting. It will make the actual soup making part go faster.

Wednesday, November 10, 2010

Warm Spinach and Brussel Sprout Salad

This didn't start out as a blog post dinner, it started off as a way to use up a huge stalk of brussel sprouts I impulse-bought when I was at a pumpkin farm. My favorite way to eat brussel sprouts is shredded up in this salad, but here's the part I hadn't thought of: I have an on-again-off-again relationship with vegetables anyway, I certainly wasn't going to be in the mood for a cold salad when it's been so dreary here lately. So the brussel sprouts were just sitting there taking up half my fridge. Then I thought to adjust that great salad recipe into something better suited for a seriously rainy day and now I'm hooked on warm salad. If you want to leave out the bacon and/or bacon fat, just substitute warmed olive oil. If you make extra dressing it will keep for at least a week, just reheat in the microwave before using.


Warm Spinach and Brussel Sprout Salad
serves 2 as a dinner

Dressing:
2 - 3 cloves garlic
4 slices of bacon
1 t mustard
3 T red wine vinegar
olive oil (maybe)
S & P to taste

Salad:
1/2 a bunch of spinach (about  6 cups), roughly chopped
12 - 15 brussel sprouts
  • Shred the brussel sprouts just like they are mini heads of cabbage (cut off the ends, cut them in half from top to bottom, then cut in super thin strips).
  • Cut the bacon into bite-sized pieces and cook in a pan until crispy. 
  • Remove the bacon, but leave the fat in the pan. You need 3 tablespoons of fat and it depends on the bacon you use if you'll have that. If it seems like you don't have enough, add some olive oil. If it seems like you have too much, take some out of the pan (but save it in case you want to adjust the flavor later).
  • Add the other dressing ingredients (not too much salt because most bacon is salty) to the pan on very low. Whisk well for a minute or two to heat the dressing and combine all the flavors.
  • Toss the spinach, brussels, bacon, and dressing together and you're done (unless you want to add toasted walnuts, which I'm going to try next time).

Sunday, October 31, 2010

Didi's Potatoes

This is one of those great recipes that reminds me that simple is often best. When I first tried these, at a family reunion a few years ago, I figured there was a complicated spice mixture involved or some secret step. I even got the recipe from my aunt, but never made them (it was too easy, it seemed like she must have left something out). Then family reunion time rolled around again and I stood at my aunt's shoulder and watched her make them. It's really as easy as it sounds. We had them for dinner recently alongside a very simple grilled chicken breast and green beans, but I had to use the photo from the family reunion - luckily I cut in line to snap a shot before the potatoes were all gone.

Didi's Potatoes
serves 4 (as a side)

2 pounds medium-sized red potatoes, skins on
4 T butter or olive oil
4 cloves garlic, chopped
1/2 t turmeric
2 t cumin
cayenne to taste
generous salt to taste
  • Boil the potatoes whole in plenty of water (time varies depending on the size) until a knife slides in the potato easily.
  • Cut them in half and then slice into half circles. You can peel them if you want, but my aunt doesn't do that, so I don't either.
  • In the bottom of the pot used for the potatoes, saute the garlic in the butter until it is just starting to brown.
  • Sprinkle on the spices and toast for a minute.
  • Remove from the heat and toss in the potatoes and salt, stir well, and you're done.

Wednesday, October 13, 2010

The Dinner Sandwich with Kale, Gouda, and Roasted Sweet Potato

Whenever John is away on a night that I work late I end up eating a white sandwich (toasted sourdough bread, mayonnaise, sharp cheddar cheese, that's it) for dinner. Not only do I love a cheese sandwich, but I also don't really cook for myself. Cook is something I do for other people. But he's going to be away more on these late evenings, so I came up with the Dinner Sandwich. It's a variation on something I made when I cooked for The Essential Baking Company. If you don't have a panini press (because, really, why do I have a panini press), just make this in a frying pan with butter on the outside of the bread - like an old-fashioned grilled cheese.

The Dinner Sandwich
serves 4, but I used the leftovers for other meals

1 red garnet yam (which is really a sweet potato)
1 bunch of kale (or spinach or chard)
1 head of garlic
4 slices Gouda
2 slices of good, hearty bread
olive oil, salt, and pepper
sliced turkey - very optional
  • Peel the sweet potato and slice into thin coins. This will make more than you need, but it's great as a snack, on another sandwich tomorrow, or cut up and sprinkled on a salad.
  • Toss the sweet potato slices in olive oil and salt and pepper and lay them out on a cookie sheet. Bake for about 15 minutes at 400 degrees.
  • Cut the top off of the garlic head and set on top of a square of foil. Drizzle with olive oil and close up the foil so the garlic is sealed in a little bag. Put this in the oven under the sweet potatoes and bake for 30 to 45 minutes. The cloves will be browned and soft. You can just squeeze them out of the papery skin and use as a spread.
  • Drizzle a tablespoon or two of olive oil into a frying pan on medium high heat. Rinse the kale and shake off the water (but don't worry about getting it dry). Tear pieces of the leaves off the woody stem and drop them right into the pan.
  • Stir the torn kale getting it all coated in the oil for about 5 minutes. Put the lid on and let it wilt for about five minutes more (you can skip this if you're using spinach or chard). You're going for cooked, but not mush.
  • You can either refrigerate everything now and use it cold later, or go right on to assembling the sandwich.
  • The main trick to great paninis (or grilled cheese) is to be sure that the cheese is the thing touching both sides of the bread. So for this sandwich I built it in this order: bread, cheese, roasted garlic squished around, sweet potato slices, kale, turkey, a little more garlic, cheese, bread again. 
  • Get it all toasty and melty and you're done. You don't even need a side dish!

Monday, October 4, 2010

Gnocchi in Browned Butter Sage Sauce


I have a sage plant that just won't quit. I bought it looking like nothing more than a sprig stuck in some dirt at least 5 years ago. I've transplanted it and mostly ignored it except to chop it down to the ground once a year, but it still comes back. It begs me to make this dish all summer as it's looking lush and full, but this is a comfort food that has to wait for fall. I've tried drying the leaves for use all year-round, but they're too tender (or I'm doing it wrong). I use dried sage from the grocery store when I need this dinner when the plant is dormant and it's still very good, but not quite as great. I first had it when the Still Life in Fremont was in it's transformation stage (not the old, funky Still Life anymore, but not The 35th Street Bistro yet either). They served it with roasted chicken. We usually just pound and pan sear chicken breasts and then slide them into the simmering sauce when the gnocchi goes in the water.

Gnocchi in Browned Butter Sage Sauce
Serves 2

4 T butter
4 cloves garlic, sliced
pinch of red pepper flakes
3 to 6 fresh sage leaves (depending on how sage-y you like it)
1 cup white wine
16 ounce package of gnocchi
  • Put your pot of water on to boil. This comes together quickly.
  • Have your garlic sliced and ready. In a frying pan big enough to hold the gnocchi and sauce at the end, melt the butter over medium low heat. Let it foam and bubble away until it is light brown - usually about 5 minutes. If you're worried it's gotten too dark (and might burn in the next step), dash in a little olive oil. This will stop the butter from browning further.
  • Add the garlic, thinly shredded sage leaves, and red pepper flakes. Saute until the garlic is light brown and the butter is slightly darker.
  • Add the wine and let simmer until reduced by not quite half, about 5 minutes more. Sometimes I don't feel like buying a bottle of white wine just for this dish, so I substitute diluted chicken stock and the juice of a lemon to equal 1 cup.
  • If your gnocchi isn't done cooking, turn off the heat and wait for it.
  • Add the cooked gnocchi to the pan and stir it for about a minute. The gnocchi itself will thicken the sauce.

Tuesday, June 15, 2010

Whole Wheat Penne with Spinach Pesto and Chickpeas

This past weekend when I took a pair of garden shears to my spinach patch I thought, why did I plant this - I don't really like spinach. I prefer chard and beet greens and kale, all of which are exploding in the garden and I can't think of how to eat them all before they bolt. Then a friend suggested spinach pesto, which she makes exactly like basil pesto. Spinach pesto, even if it turned out as boring as I think spinach often is, would be garlicky and lemony and freshy. A pasta dinner started coming together in my mind. We were thinking we'd grill some chicken to add a little protein, but our budget for meat was busted (we're trying to only eat animal products from local, organic, ethical farms, but since we're on a serious budget around here that means we can't afford to eat as many as we used to). Inspired by my favorite ceci bruschetta topping, I added the chickpeas instead. It's a winner - fast, cheap, healthy, and super-flavorful.

Whole Wheat Penne with Spinach Pesto and Chickpeas
serves 3 to 4
printable

For the Pesto:
2 cloves of garlic, peeled
4 cups (loosely packed) spinach, washed and dried well
1 lemon
1/4 cup olive oil
1/2 cup parmesan, grated

For the pasta:
1 pound whole wheat penne, or other short pasta
1 clove garlic, minced
1 15oz can of chickpeas (a.k.a garbanzo beans)
1 sprig rosemary (optional)
extra parmesan for garnish

  • While the water for the pasta is heating, make the pesto (or substitute store-bought basil pesto) by first grinding the garlic with a little salt and pepper in a food processor. Then add the spinach and lemon and grind again. Add the cheese and drizzle in the oil a little at a time until it is the consistency you like.
  • In a small frying pan on medium heat, saute one garlic clove in a little olive oil until it just starts to brown.
  • Add the (drained) chickpeas and the rosemary sprig. Cook, stirring only a few times, until the chickpeas have browned a bit - about 10 minutes.
  • Toss the pasta with the pesto, chickpeas, and salt and pepper. Garnish with more parm. It's great warm or cold.

Tuesday, June 8, 2010

Orecchiette with Hearty Greens and Spicy Sausage

I didn't mean to have two posts in a row with the sausage/pasta/greens combination, but three things are at work here: 1) I love this combination 2) I have a small garden of mostly hearty greens and they are bursting out of their boxes, begging me to pick and eat them 3) I wasn't going to post this at all, but it turned into one of the best, fast dinners that we've made in a while. This is really just a variation on the Sausage Pasta that I've already posted, but see #3 above.

Orecchiette with Hearty Greens & Sausage
serves 4
printable version

1 regular onion, sliced
4 gloves of garlic, sliced
4 hot Italian sausages, casings removed (or a little less than a pound of bulk sausage)
4 cups (2 big handfuls) hearty greens like Kale or Chard, rinsed and cut into small pieces (sometimes you can find "braising mix" in the grocery store and that would be perfect)
1 pound Orecchiette, or other short pasta like Penne
plenty of grated Parmesan cheese
  • Put a pot of water on for the pasta.
  • In a large pan, saute the onions in a few tablespoons of olive oil (over medium heat, so they brown but don't burn), stirring often. When most of the edges are beginning to brown, add the garlic and saute that until it starts to brown.
  • Add the sausage to the onions and garlic, breaking it up into small pieces as it cooks. If the sausage is cooked through before the pasta is in the water, turn off the heat and set it aside.
  • When the pasta has about 5 minutes left to cook, add the greens to the pan (if you took it off the heat, turn it back on when the pasta goes in the water). Cook the greens while the pasta finishes.
  • Drain the pasta and toss it with the sausage mixture.
  • Serve sprinkled generously with salt, pepper, and grated Parm.

Thursday, April 1, 2010

Green Chile Pork Tacos with Homemade Sour Cream

My favorite thing to make in my slow cooker is a spicy, tomatoey pork taco filling. I used to say it was the only thing worth making in a slow cooker, but now I know about a few other things. Lately, I've been trying to make my own tomatillo salsa for Stacked Tomatillo Enchiladas (success finally!), but since I still can't quite get that right I keep ending up with tupperwares full of decent, but not fantastic tomatillo salsa. What to do, what to do... Last week I adjusted my old, favorite taco recipe to be green instead of red and we were shocked to discover that we like it better. Shocked! How could our most loved dinner be changed and improved? Our world is rocked over here.
Oh, and, we served it with homemade sour cream. Maybe that's why these were some of the best tacos I've ever made...


Green Chile Pork Tacos
serves 4 to 6

1 yellow onion, diced
4 cloves garlic, diced
3 pounds boneless pork (just about anything will work, but you might need to trim off fat depending on which cut you use)
2 cups chicken stock (depending on your slow cooker)
2 T cumin
2 T oregano
2 cups tomatillo salsa (store-bought or try this recipe)
1 bunch cilantro
1 to 2 T pickled jalapenos, minced (they're spicy)
1 7 oz can green chiles, or equivalent fresh chiles roasted and diced
2 limes
avocado
corn tortillas
sour cream

  • Sprinkle the meat with salt and pepper. Heat a little oil in a large frying pan and brown it on all sides - you're not cooking it now, just creating flavor. Put the meat in the slow cooker and put the lid on.
  • In the same pan, saute the onion until the edges start to brown, scraping up any good bits the pork left behind. Then add the garlic and saute just until it starts to brown.
  • Sprinkle the onions and garlic with the cumin. Have your stock ready. Toast the cumin until it starts to stick, then, quick, dump in your stock.
  • Add the rest of the ingredients BUT reserve 1 lime and some cilantro for the end. Bring this all to a bubble (I never put anything cold in my slow cooker) scraping the bottom to get all the toasted goodness off.
  • Pour this over the meat in the cooker and give it a bit of a stir so that the meat is coated. Scrape down the inside of the cooker so that no sauce is splashed above the line of sauce/meat (this helps with clean-up and prevents burned edges).
  • Cook on High for 6 to 8 hours. I check mine after 6 hours to see if it's too soupy. If it is, I cook it the last 2 hours with the lid off. Slow cooker vary a lot so you might need to stop after 6 hours or add a little more stock and keep going. The meat should me falling apart.
  • Add the juice of the second lime, break up the meat a little, and stir it in with the sauce. Serve it however you like tacos or with rice and beans. 

Tuesday, March 30, 2010

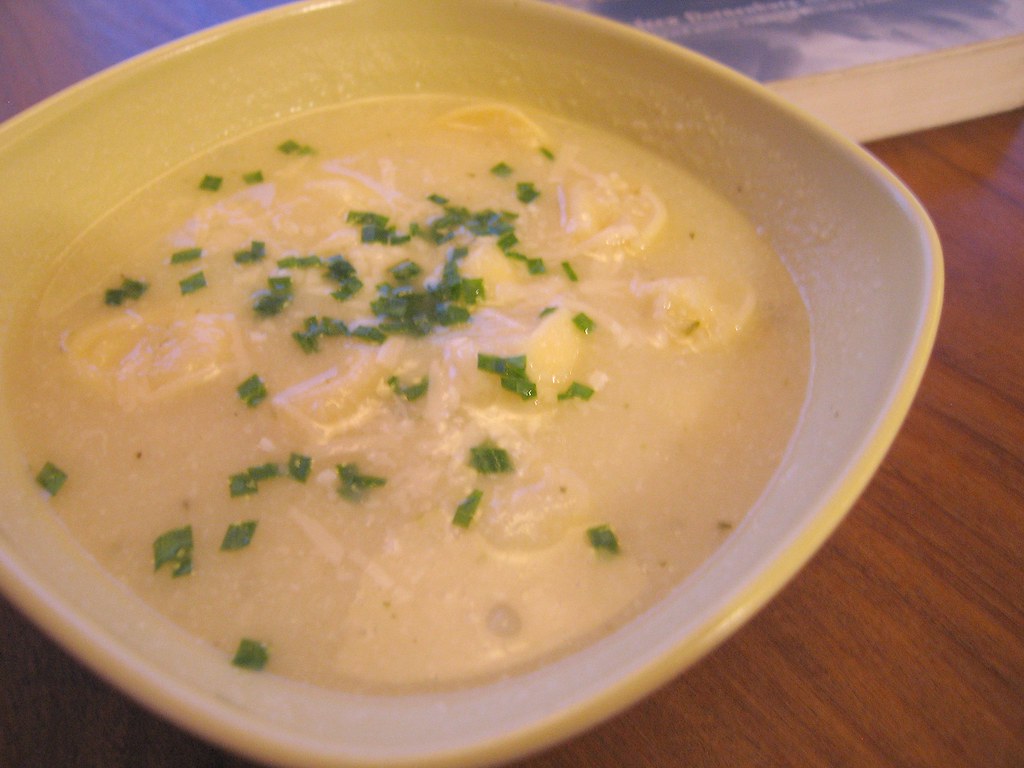
Cauliflower & Tortellini Soup


I got this soup idea from one my friend Jess made for me. It's so simple and delicious. We arrived for dinner one night and she had just thrown everything into a pot. By the time we were ready to sit down it was ready to be pureed and we had a bright, fresh soup course (she's so good with the courses! I never do that). The squeeze of lemon really makes a difference.We changed the pasta from bowties to tortellini to make it hearty enough for dinner. It would be very easy to make this even heartier (add chopped chicken) or vegan (go back to the bowties).

Cauliflower & Tortellini Soup
serves 4

1 onion, roughly chopped
4 cloves garlic, roughly chopped
1 medium cauliflower, roughly chopped
2 medium-sized russet potatoes, peeled and roughly chopped
6 to 8 cups vegetable or chicken stock
1 bay leaf
1 t fresh thyme
pinch of nutmeg
salt & pepper to taste (always)
rind from a piece of parmesan (optional - it's just for extra flavor)
juice of 1 lemon
1/2 cup grated parmesan cheese
1 10oz package of tortellini (or other pasta)

  • As with almost every recipe I make, start by sauteing the onion in a few tablespoons of olive oil in the bottom of a medium soup pot. When the onion has just started to brown, add the garlic and continue until it just starts to brown.
  • Pour in half of the stock to stop the browning, then add the potatoes and and cauliflower. Add stock just to cover everything.
  • Stir in the bay, thyme, nutmeg, salt & pepper, and parm rind and bring to a low simmer. Let it bubble for about half an hour, stirring occassionally.
  • After about ten minutes I start the water for the tortellini (just cook it according to the package). It would be nice if you could cook pasta in soup, but I've never had good results with that. If the tortellini is done before the soup, be sure to toss it with a little butter so it doesn't stick together.
  • After the 30 minutes the potatoes and cauliflower should be falling apart. Fish out the bay leaf and the parm rind. Puree it with an immersion blender or let it cool just a bit so you can blend it in batches in food processor.
  • Stir in the grated parm, lemon juice, and the cooked tortellini. Done!

Tuesday, March 16, 2010

Dreams of Summer Fish Stew

We didn't go on a vacation to sunny weather this Winter, but this Seattle Spring has been so lovely it's almost making up for it. We're already craving lighter dishes, spending time in the garden, going on more walks. That also means we're running into the Summer dilemma of wanting to cook and post things to the blog, but not wanting to spend the time inside to do that. So Sunday evening we searched around online looking for inspiration for dinner. It needed to be something very fast (John had spent three days making cakes and cookies), light but hardy, and it had to satisfy the dreams of Summer that the weather was conjuring. We found it on the Everyday Food page (a great resource if you're comfortable tweaking the sometimes bland recipes). This would be a wonderful dish for entertaining because it all comes together so quickly and it's unusual, but delicious. It's one of our new favorites.

Dreams of Summer Fish Stew
serves 4 to 6

2 pounds firm-fleshed fish (we used Cod)
2 limes
1 onion, sliced
4 garlic cloves, minced
2 t cumin
cayenne to taste
2 T tomato paste
2 cups chicken or fish stock
1 15oz can coconut milk
2 15oz cans of diced tomatoes
rice and chopped cilantro for serving
  • Cut the fish into two-bite pieces (remove bones if there are any) and put this in a bowl. Squeeze the limes over the fish and let this sit while you work on the rest (about 15 minutes). Give it a stir after a few minutes to keep the fish coated with the lime.
  • In a small soup pot, saute the onion in a little olive oil. When the edges just begin to brown, add the garlic and let that saute for a few minutes.
  • Sprinkle the cumin and cayenne over the onions and garlic. Toast the spices for about a minute and then add the tomato paste. Stir well (so that the paste can toast, but not burn) for about 2 or 3 minutes.
  • Add the tomatoes, coconut milk, and the fish - including the lime juice - to the pot. Add salt to taste.
  • Add the stock a little at a time, stirring gently. Stop adding stock when the consistency is how you like it.
  • Simmer for 15 minutes, or until the fish is just starting to flake apart.
  • Ladle the stew over cooked rice and sprinkle with chopped cilantro.

Saturday, January 23, 2010

Chilaquiles Soup


This recipe came together so quickly last night and it was so good that I'm rushing to get it on the blog so that you can make it for dinner tonight. Chilaquiles traditionally are tortillas chips simmered in sauce and then topped with different things (chicken, scrambled eggs, etc...). It's not much of a stretch to turn them into a soup and I find them easier to eat this way. I found this recipe in the '97 Joy of Cooking, they credit Rick Bayless for giving them the recipe, then I adjusted it to my tastes, and now I'm passing it on to you. Psst... pass it on. 

Chilaquiles Soup
serves 3 to 4
instructables version (lots more pictures)

1 or 2 fresh jalapenos
2 garlic cloves, unpeeled
1 28oz can whole tomatoes, drained
1 medium yellow onion, sliced
3 cups chicken or vegetable stock
2 chicken breasts
1 T cumin
1 T oregano
2 to 4 medium handfuls of thick/authentic style tortilla chips
1/2 cup cilantro
sour cream
grated jack or cheddar cheese
  • In a dry, thick-bottomed pot or pan (cast iron is great) roast the jalapeno and garlic over medium-high heat. It takes about 15 minutes and it seems strange, but you just leave them in the bottom of the pan, turning them as each side turns dark brown/black.
  • In a bit of oil, in a small soup pot, saute the onion until it is soft and starting to turn brown.
  • Peel the garlic and take the stem out of the jalapenos. Puree them in a food processor or blender. Add the drained can of tomatoes and blend again.
  • Transfer this to the soup pot of onions and heat for about 5 minutes.
  • Add the stock, raw chicken breasts, cumin, and oregano and simmer for 20 minutes. Don't taste it until it has simmered for a bit because it's the simmering that kills any bacteria that might be in the chicken.
  • Remove the chicken and cut it into cubes. Add this back to the pot along with the cilantro and tortilla chips. Simmer for about 3 to 5 minutes - just until the chips are soft.
  • Serve topped with sour cream and cheese. Muy Sabroso!
P.S. I've tagged this as vegetarian because it would be so easy to leave out the chicken (maybe add beans?).

Tuesday, December 15, 2009

Slow-cooked Leek and Proscuitto Pasta

That Jamie Oliver, he sure has a way with leeks. My Leek and Chick Pea Soup (that is pretty much everyone's favorite on this blog) was adapted from his recipe and now I had another adaption of one of his - Slow-cooked Leek and Proscuitto Pasta. This is so crazy good I lick my plate when we have it. I suggest making a huge batch of the slow-cooked leeks and keeping them on hand (they'll keep in the fridge for a week or two and would probably freeze fine, but I never have them around long enough to test that) for pasta or for an even faster version of the soup. This is a very monochromatic dish so I've been holding off posting it in hopes of having a good picture. Oh well, it's too good to keep secret any longer.

Slow-cooked Leeks & Prosciutto Pasta
serves 4
printable version

4 leeks
3 T butter
1 T olive oil
4 cloves garlic, sliced
1 c chicken stock
1 c dry white wine
4-6 slices of prosciutto
1 pound rigatoni, penne, or similar pasta
grated Parmesan
  • Prep the leeks by cutting off the root end and the green top (I use the green up until it gets stiff, but leek purists don't use any green). Slice them lengthwise and then into thin half-moons. Leeks can have dirt in between their tight layers so I rinse mine well and then dry them in a salad spinner.
  • In a wide, deep frying pan, melt the butter and heat the oil (the bit of oil keeps the butter from browning). Add the leeks and garlic and saute for about 10 minutes or until you are just starting to see browning.
  • Add the wine and stock and then lay the slices of prosciutto over the top (see the photo above). You can substitute salami or ham, you'll just need enough to cover the leeks.
  • Reduce to a simmer for 30 to 40 minutes. Do a couple checks to make sure the leeks aren't sticking, but don't stir in the prosciutto. If it seems like the pan is drying out you can put a lid half on and/or add a little water.
  • Prepare your pasta while the leeks are simmering.
  • Remove the prosciutto and slice it into thin pieces. Stir this into the leeks.
  • Toss the leeks with the cooked pasta, top with Parm. and you're done.

Monday, November 16, 2009

Cupboard Soup: Chicken, Green Chile, Tortilla Soup

A Cupboard Soup comes together on one of those days when I ask myself, "what do I have in the cupboard that could make a meal because I've already been to the grocery store 4 times this week?" This is one of my best successes so I thought it would be a good example of how to throw something together. I always keep onions, garlic, and my good old concentrated stock stock around. You also need something for flavor (herbs, tomatoes, salsa, chilies, sausage, leftover side dishes that won't turn into mush) and something for bulk (beans, lentils, split peas, potatoes, canned or fresh veggies). I also like a protein (if that isn't where my main flavor is coming in) and I usually have that in my freezer from some budget-breaking trip to Costco. Follow the method below and you can change the ingredients around a million ways. I didn't have anything for bulk except tortillas so this turned out a little thin (I'm really more of a stew person than a soup person), but so good. It could have used maybe corn or potatoes or black beans.

Chicken, Green Chili, Tortilla Soup
serves 6
printable version
instructables version


2 chicken breasts
1 onion, diced
4 cloves garlic, minced or pressed
8 c stock
1 7oz. can of green salsa
2 4oz. cans diced green chiles
8 corn tortillas, cut into strips
1/2 bunch cilantro (more if you want garnish)
juice of 2 limes
1.5 T cumin
1 T oregano
pinch of cinnamon
pinch of cayenne
sour cream for garnish

  • Rinse and pat dry the chicken breasts, then sprinkle one side with salt & pepper. Heat a tablespoon or two of oil in a  soup pot (or saute pan if you're going to use a slow cooker) on medium-high heat. Place the salted side of the chicken down in the pan. Now sprinkle the other side with S&P. Brown both sides well, but don't worry about cooking them through. This searing step is optional, but it adds flavor.
  • Remove the chicken (either set it aside or put it in the slow cooker). In the same pan, saute the onions until the edges are starting to brown , then throw in the garlic and saute until it starts to brown also. You  might have to add a little more oil.
  • Toast the cumin by sprinkling it over the onions and garlic and stirring it for a few minutes.
  • Pour a few cups of stock into the pan and scrape all the good browned bits off the bottom.
  • Add everything except the sour cream and half of the tortillas to the soup pot or slow cooker. This soup is best if you put it on early and let it simmer for a couple of hours (I put it on high in the slow cooker while I'm at work all day).
  • When you're almost ready to eat, take the chicken out of the pot and cut it into bite-sized pieces. I like to give it a quick blend with my hand-blender before adding the chicken back in, but that's optional.
  • For a great garnish, spread the remaining 4 tortillas (cut into strips) on a cookie sheet. Drizzle the strips with oil and sprinkle with salt & pepper. Give them a quick toss to coat everything and pop these in the oven for about 10 minutes at 350, or until they're brown.
  • Serve with the toasted tortilla strips and a generous dollop of sour cream.

Tuesday, November 3, 2009

Chai (not for dinner)

I can't quite decide how to tag things that aren't for dinner. Lately, as I've been a little bored with our meals and frustrated with the cookbook, I haven't been as inspired to post dinners, but we're still having fun in the kitchen. Like this Chai that I make for us on the weekends - it's so simple, but so wonderfully warming on these dreary days. I keep the extra in the fridge and microwave it for my morning tea the next day. Buying the spices in bulk, and using tea that's not as nice as what I drink just plain, keeps this really inexpensive. Thanks to Elise for introducing me to the recipe (which is adapted from this Gourmet, I think).

Homemade Chai
fills two16oz mugs
Instructable version

3 scoops/teabags black tea (Darjeeling, English Breakfast, etc...)
1 inch fresh ginger, cut into rounds
1 cinnamon stick
2 t black pepper corns
10 or so whole cloves
5 cardamon pods
3 cups water
1 cup milk/soy (I use whole milk)
1/4 c brown sugar

  • Put all of the spices in a sealable plastic bag and bruise them well by pounding with a rolling pin or hammer. Don't go crazy, though, you're bruising not destroying.
  • Add the spices to the water in a small pot. Bring to a boil and then reduce to a simmer for 10 minutes. It helps to partially cover so you lose less liquid, but that's optional.
  • Add the tea and let steep for 3 to 5 minutes, depending on the tea and how strong you like it.
  • Strain the Chai into a bowl and then add the liquid back to the pot (I usually have to give it a rinse to get out all the bits).
  • Add the milk and sugar and bring back up to hot.
  • Serve with cookies on a rainy day.

Friday, October 2, 2009

Chicken Cacciatore

The first time I looked up recipes for Chicken Cacciatore I was amazed by how much the different versions varied both by ingredients (olives, peppers, mushrooms, eggplant and zucchini, or none of those things) and by cooking method (oven, stove top, slow cooker). The heart of this dish is chicken cooked with tomatoes to make a hearty not-quite-stew that I like to serve with polenta. What I'm really saying is feel free (like I did) to change this around as much as you'd like and let me know how it goes!

Chicken Cacciatore
serves 4 to 6
printable recipe

3 pounds boneless, skinless chicken thighs
1 onion, diced
4 garlic cloves, sliced
1/2 pound crimini mushrooms, quartered
1 red bell pepper, sliced (or roasted red peppers)
1 T tomato paste
1 cup red wine
2 cans (15oz) diced tomatoes
1 T oregano
smidge of cinnamon
1 big sprig of rosemary
pinch of red pepper flakes
1 bay leaf
5 to 10 olives of your choice
Parmesan cheese
  • Heat a couple tablespoons of olive oil in a deep-sided saute pan (or soup pot if you don't have a saute pan big enough). Sprinkle one side of  the chicken with salt & pepper. Place the salted side down in the pan and cook until it's a little brown. Sprinkle the other side and repeat. You will probably have to do this in two rounds. Set the chicken aside.
  • In the same pan, saute the onions and garlic (add a little more oil if needed) until they are just starting to brown.
  • Add the mushrooms (keep the heat high, mushrooms like that) and peppers and saute until they are starting to get brown edges. If the onions and garlic start to head in the direction of too brown, just go to the next step and it will all still turn out great.
  • Add the tomato paste to the vegetables and saute for about 2 more minutes. Tomato paste always tastes better if it is browned.
  • Add the wine and bring to a boil for a couple of minutes. Scrape all the good browned bits off the bottom of the pan.
  • Add the chicken, tomatoes, herbs and spices, and the olives.
  • Give it all a good stir and allow it to simmer, uncovered, for 30 to 40 minutes. Just check it a couple of times to be sure nothing is sticking
  • Serve with pasta or polenta and top it with grated Parmesan cheese. Yum!!
PS - No, I still don't really like olives, but I do use them to season dishes. I just don't eat them.

Wednesday, September 23, 2009

Chocolate Zucchini Carrot Spice Cake

If you have ever grown zucchini (or had a friend or neighbor who has) you know that this is the time of year for baseball-bat-sized vegetables that aren't good for much other than the compost bin. But this cake, oh my, this cake is so moist, so perfectly chocolaty without being over-sweet, that you'll never regret letting your zukes stay on the vines too long again (or you might go beg your friend to rescue one from the compost heap in exchange for a slice). I don't do nutritional information, but this has to be relatively healthy - no butter and lots of veggies.
It's so good, you'll even buy zucchini to make it. My Mom often made this at the holidays and it's always a hit. It doesn't even need ice cream on the side and I never say that about cake.

2 cups flour
2 cups sugar
1/2 cup unsweetened cocoa powder
1 teaspoon each of:
   cinnamon
   baking soda
   baking powder
1/2 teaspoon each of:
   nutmeg
   allspice
   salt
1 1/2 cups grated zucchini
1 1/2 cups grated carrots (peeled first)1 bag (16 oz) chocolate chips
1 cup oil (canola or something other than olive)
4 eggs

  • Preheat the oven to 325 degrees and oil a 9x13 pan.
  • Sift all of the dry ingredients together into a large bowl (or the bowl of a mixer).
  • Stir in the carrots, zucchini, and chocolate chips.
  • Beat the eggs and oil together until well combined.
  • Add the wet things to the dry things and mix well.
  • Pour into the prepared pan.
  • Bake for 50 to 55 minutes. If you test with a toothpick you might spear a gooey chocolate chip and that might make it seem like it's not done. Mine took the full 55 minutes.

Tuesday, September 15, 2009

Turkey & Green Chili Chili

I was supposed to take a pretty picture of this chili so that I could put it with the post, but when I got home from work at 8:30 on a rainy evening my house was so full of the smells of spices and limes and chilies that I completely forgot about taking pictures. Chili and the Slow Cooker are best friends. All the spices that give Chili its flavor can be gritty and harsh if they aren't cooked for a while, but I pretty much refuse to make most things that have to be tended over a long period of time (I've never roasted a turkey or made a pot roast in the oven or baked a loaf of yeasty bread). Except for rare special occasions, I run out of patience at about an hour. This Chili requires about 20 minutes of working time. It's also a perfect September recipe because it has a Summery feel, but it's warm and comforting (for weather that can't make up its mind). On top of that, it freezes well for leftovers.

Turkey & Green Chili Chili
(Printable Version)
serves 4 to 6

1 onion, diced
6 cloves of garlic, minced
20 oz. ground turkey (I never have just a pound because of the stupid way it comes packaged around here)
2 T cumin
4 T chili powder (I use one low in salt from a natural foods market)
1 T dried oregano
1 t garlic powder
cayenne to taste (start with a pinch)
14 oz (2 cans) Herdez Salsa Verde, or your favorite brand
8 oz (2 cans) diced green chilies
4 cups chicken stock
4 to 6 cups cooked beans (white or pinto) depending on how thick you like your chili
1 bunch of cilantro, chopped
juice of 2 to 4 limes (I like 4, but it's pretty limey)
sour cream for garnish
  • Saute the onions and garlic for a couple of minutes and then add the cumin, chili powder, and cayenne. Saute until the spices are toasty or until they start to stick to the pan.
  • Add the turkey and cook until it's no longer showing pink (it doesn't matter if it's cook all the way through).
  • Add the oregano, garlic powder, salsa, green chilies, and stock to the pan and bring to a simmer. You can skip this step and just put it all right in the slow cooker if you want. I find that mine works a little better if the ingredients are warm when they go in.
  • Transfer this to the slow cooker and add the beans. Cook on high for 4 hours. 2 hours will do (in most slow cookers) if you're in a hurry or if you're doing this on the stove top.
  • Add the cilantro (reserving some for garnish if you want) and the lime juice. Cook for another 2 hours.
  • Top with sour cream and cilantro and serve with corn bread or toast.

Friday, September 4, 2009

Corn & Chicken Chowder

This is my the first soup of the season and I'm not sad to see the our weekly menus turning toward Fall dishes. After I left my last kitchen job I had to take some time away from soup (I still have mild PTSD around Butternut Squash thanks to that mole soup I made once a week at Essential), but I'm slowly re-learning all my old favorite recipes. I remember now that the reason I was (mostly) a soup chef for 4 years was that I love soup - the comforting warmth of it, the fact that it takes a little set up, but then is mostly left alone, and I also just love things served in a bowl.
This Fall I hope to post Pork Posole (both the long way and a quick variation), a Portuguese sausage and Kale soup that's so good, two kinds of Chili, Rosemary and White Bean soup in the slow cooker, just to name a few. I'd love to hear your favorite soup ideas.
If you're doing corn and chicken at a late Summer barbecue, cook a little extra so that you can use the leftovers for this chowder.

Corn and Chicken Chowder
serves 4 to 6

1 yellow onion
4 cloves garlic
1 T cumin
1 T oregano
1 t dried sage (or a few fresh leaves)
1 t mustard powder
2 bay leaves
smidge of cinnamon
smidge of cayenne
8 cups stock (or enough stock base to make that)
2 pounds chicken (cooked and cubed)
6 ears of corn, cooked (or 2-3 cans)
2 fresh jalapenos
2 russet potatoes, cut bite-sized (I like skin on)
8 shakes hot sauce
6 T each of butter and flour
2 cups cream
  • Like just about every recipe I know, start by sauteing the onions in a little oil until they're just starting to brown. Then add the garlic and saute until it just starts to brown.
  • Add the spices (except the oregano) and let them toast for just a minute or two.
  • Add the oregano, stock, corn that's been cut from the cobs, the cobs too(!!), potatoes, chicken, and jalapenos.
  • Allow this to simmer (not boil) for about an hour. Give it a stir from time to time to make sure it doesn't stick. Add more stock if you need to.
  • Remove the corn cobs and add the hot sauce.
Now we're going to make a roux to thicken the soup. Don't be afraid. Just read this through first and if you haven't made a roux before have someone there to help pour the liquid for you because that's the scary part.
  • Melt the butter in a frying pan (best if it's not non-stick) over medium-low heat.When it is bubbling, have a whisk and a ladle ready.
  • Sprinkle the flour over the butter while whisking. Keep the butter and flour moving (but you don't need to go too crazy) and you should notice the color start to lightly brown. The mixture should also be bubbling. If you were making gravy you'd keeping going until the flour was dark brown, but this is for chowder so you just want a light brown.
  • Remove the pan from the heat and add the cream in a steady stream (not a dump or you might get lumps) while whisking vigorously (now you can go crazy). Add a couple of ladles of the broth from the soup so that the roux stays smooth.
  • Add this roux, cream, and broth back into the soup and stir well.
  • Adjust the salt and pepper.
  • Try adding a little lime or cooking the onions with bacon and bacon fat.
Here's a quick summary of my tricks for soup:
-use more spices than you think you should,
-sneak in some mustard powder (it's often the secret something that makes my soups flavorful and I don't even really like mustard!),
-use a stock paste instead of liquid stock (like Better Than Bouillon) because then you can control the stockiness and also because a lot of liquid stocks taste too much like carrots or celery or fake things,
-add tough and sharp things (meats, fresh sage, beans, onions) in the beginning so they can mellow, add soft things (basil, soft veggies, dairy) at the end so you don't end up with mush.

Wednesday, July 8, 2009

Curry


I'm surprised by how hard I'm finding it to write about this simple chicken curry recipe. I think of it as the first recipe that I really developed on my own, but it's also a recipe I strongly associate with my Mom. When I was 19 and getting ready travel around the world, with a 3-month stop in India, Mom thought I should probably try Indian food before I left. We ended up at a little Indian place on Broadway (where there is now just an empty pit waiting for a train station). I don't really remember the food, but I remember how much she wanted me to be happy and fed on my long trip. We worked on this recipe together when I got back. I found several empty cans of the spice mixture (that I gave as gifts one Christmas) among Mom's things. I was gone for 9-months in the end and tried so many types of food, but the foods of France and India are the ones that have stayed with me.
I'd hate to make this curry for someone who really knows Indian food and find out that it is terrible. This has become a comfort food for me. It works just as well in the slow cooker or bubbling away for an hour on the stove top. Make up a batch of the spices and use it to coat potatoes before roasting or chicken before grilling.

Simple Chicken Curry
Spice Mix:
1 T whole mustard seed
1 T whole cumin seed
3 T ground cumin
1 T turmeric
2 T coriander
1/2 t cayenne (which makes it a little spicy)

The Rest:
1 large yellow onion, diced
6 chicken thighs or 3 breasts
3 T butter
1 15 oz can of diced tomatoes, with liquid
1 T tomato paste
1 15 oz can of  Garbanzo Beans, drained
1 cup of stock (or even better a stock paste like Better Than Bouillon)
  • Melt the butter in a large saucepan, add the onion and saute until the edges are just starting to brown. If you worry that the butter is starting to scorch, add a little oil (anything but olive) and this will stop the butter from browning.
  • Have your tomato paste and canned tomatoes ready to go, but first sprinkle all the spices over the sauteed onion. Stir the onion and spices until the bottom of the pan is starting to get coated with brown (usually the mustard and cumin seeds will just start to pop), then add the tomato paste and cook all of this until you're worried it will start to burn.*
  • Add the chicken (this should add enough juice to prevent burning, but if you're worried add just a little of the liquid from the tomatoes) and stir this for a few minutes to coat the chicken with spices.
  • Dump in your cans of tomatoes and Garbanzo Beans. If you have liquid stock, add 2 cups now. I always prefer to use a paste stock like Better Than Bouillon because then the water can come from the rinsed out can of tomatoes, the packaging is way less than liquid stock, and I can control how much I add much (I always start by making it half strength and then add more if needed).
  • Once this has started to bubble you can either put it in a slow cooker for about 6 hours on high, or reduce the heat to a simmer and let it cook on the stove for about an hour (stirring a few times to be sure it doesn't stick).
  • Serve with plain, full-fat yogurt and Basmati rice.
*This step of toasting the spices and cooking the tomato paste is really important. I do this now whenever dried spices or tomato paste are called for in a recipe (don't do it to dried or fresh herbs).

Remember, big T is tablespoon, little t is teaspoon.
Related Posts with Thumbnails